|
RT-COLD PROCESS SOAPMAKING METHOD
& ZIP LOCK SWIRL TECHNIQUE Property of Laurie Teason Conditioning Soap (Winters Blend) Soap Recipe Hard Oils: 2 oz Shea Butter 4 oz Mango Butter 22 oz Coconut 30 oz Palm Liquid/Soft Oils: 6 oz Hazelnut 39 oz Olive 14.46 oz Lye (NaOH) 34 oz oz Water Scent: 2 oz Peppermint 1 oz Tea Tree 1 T Spirulina 1 T French Green clay 1/2 T Red Clay |
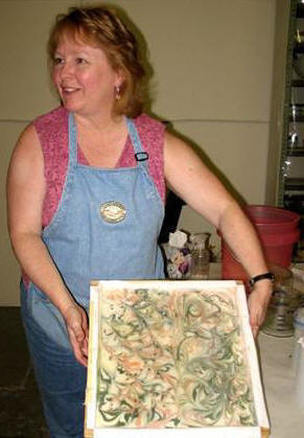
A picture of the soap made with this swirling technique.
|
Instructions
(Recipe and directions are intended for experienced soapmaker)
Preparing Soap for Swirls
Ready to Swirl
Tips
The soap we made earlier that day was made at 2PM. The lid was removed at 4:30 and placed it on the cool concrete floor.
Soap was cut it at 7:45 PM (which you can see in the slide show- it is the soap that had been cut into bars)
Everything pre-measured. It only took 15 minutes to make this RT- Clay swirl soap
(Recipe and directions are intended for experienced soapmaker)
- Measure out hard or solid oil and butters and place in soap pot
- Slowly add lye to water, stir and when the lye is dissolved pour over hard oils in soap pot
- Use the stick blender to break up chunks
- Once chunks are melted add liquid/soft oils to soap pot and stick blend
- Bring to a thin trace
- Pull out about a cup of soap per swirl color and set aside
- Before add scent to soap prepare soap for swirling so you are all set to go
- To the soap pot add your scent and stick blend to a medium light trace
- Pour into lined mold, shake to level soap out
- Now you are ready to start swirling but first..
Preparing Soap for Swirls
- For each cup of soap base you reserved you will now add colorant and mix well using a whisk. Pour into a Freezer Zip-Lock bag and make sure it is completely sealed
- Repeat this step for ever swirl color you are using
Ready to Swirl
- Now snip just a little bit of the corner of the bag
- Making sure the tip of the cut corner of the baggie is in a downward position, squeeze while making a Curly Q pattern.
- Depending on the amount of pressure you use to squeeze the soap out the baggie will determine how far down the soap will hit the mold.
- When squeezing if the colored soap disappears there is a good chance it hit bottom.
- Keep the curly Q pattern moving so you don't create a huge blob of colorant on the bottom of the soap
- When squeezing, if the colored soap is just laying (raised) on top of the soap, there is a good chance it is just on the surface and did not go any deeper
- When squeezing, if the colored soap is still visible on the surface but not raised, there is a good chance you hit the middle of the soap base
- You are aiming to do all three depth levels!
Tips
- Don't crowd your swirl pattern, leave yourself some swirling room so you can spread the swirl pattern out.
- Don't over swirl- it is easy to do because you are having so much fun, try to contain yourself. LOL
- I personally do not scent the soap that is being used for swirling
- Cover the soap, bring to a full gel, and then remove the lid.
The soap we made earlier that day was made at 2PM. The lid was removed at 4:30 and placed it on the cool concrete floor.
Soap was cut it at 7:45 PM (which you can see in the slide show- it is the soap that had been cut into bars)
Everything pre-measured. It only took 15 minutes to make this RT- Clay swirl soap